Backend (BE) Fee - Creation & Update Guide
Last updated: May 7, 2026
Overview – How the BE Fee Works
The Backend Fee is configured as a single End-of-Term fee and recognized for OID
The system automatically calculates the weighted average rate across different periods
You do not need multiple fees - all changes are handled via rate updates
Each rate change creates a restructure event, which is tracked and used for OID
Step 1: Create the Backend (End-of-Term) Fee
Navigate to the Loan Fees section
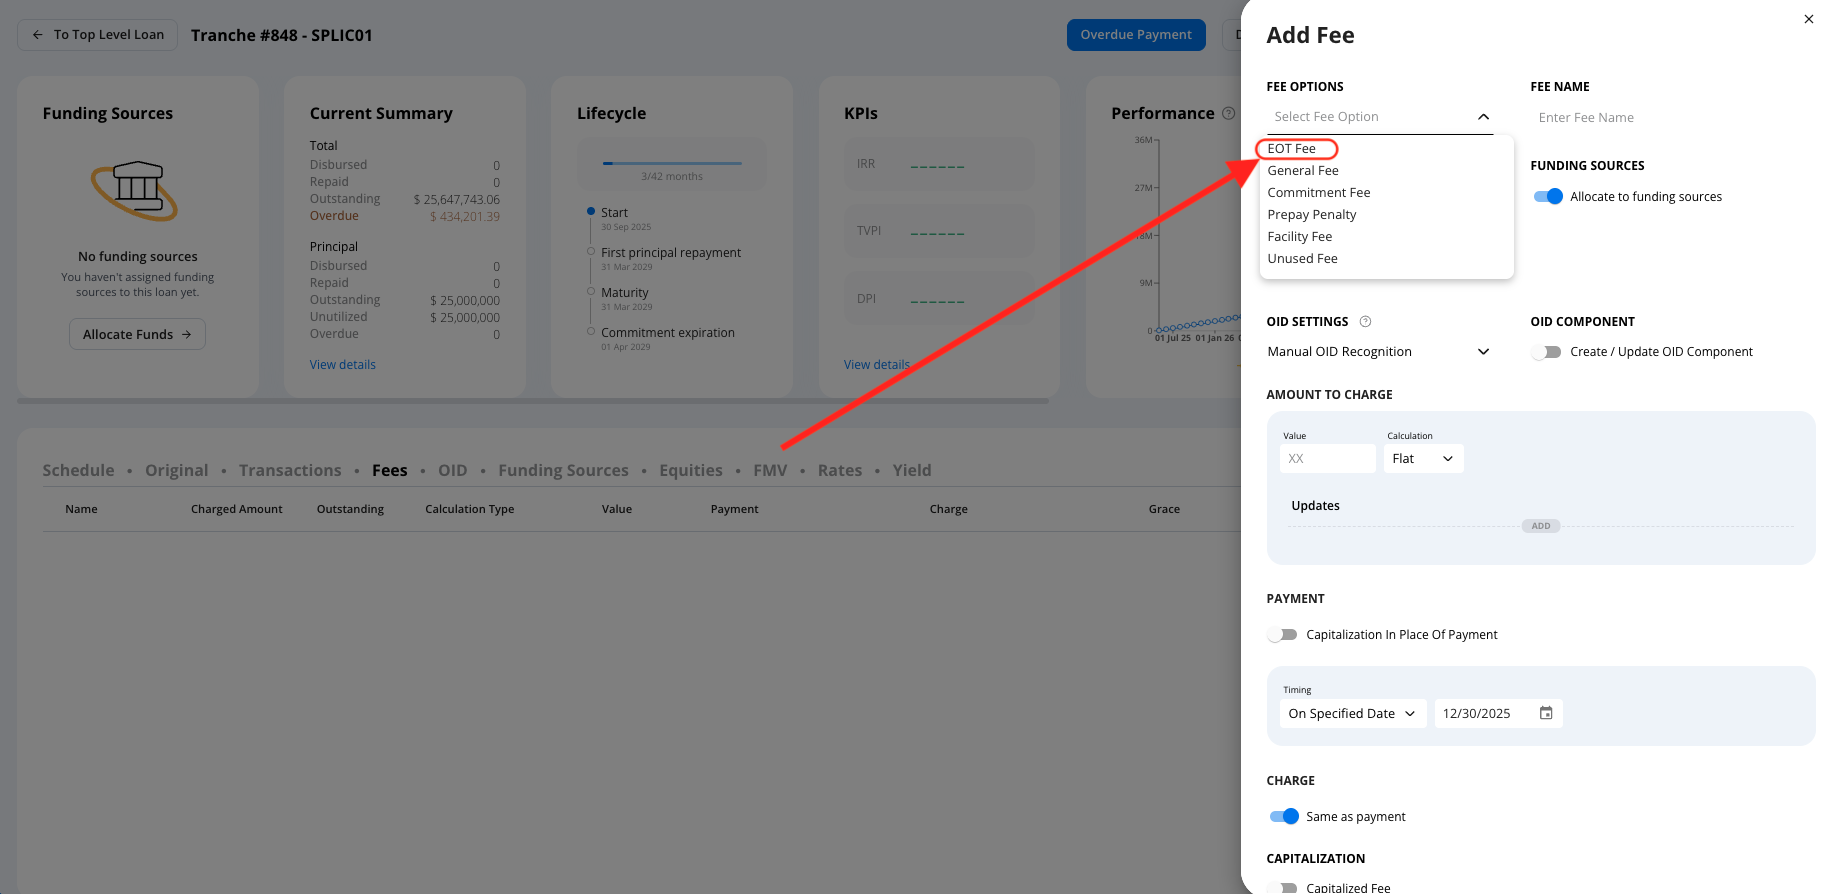
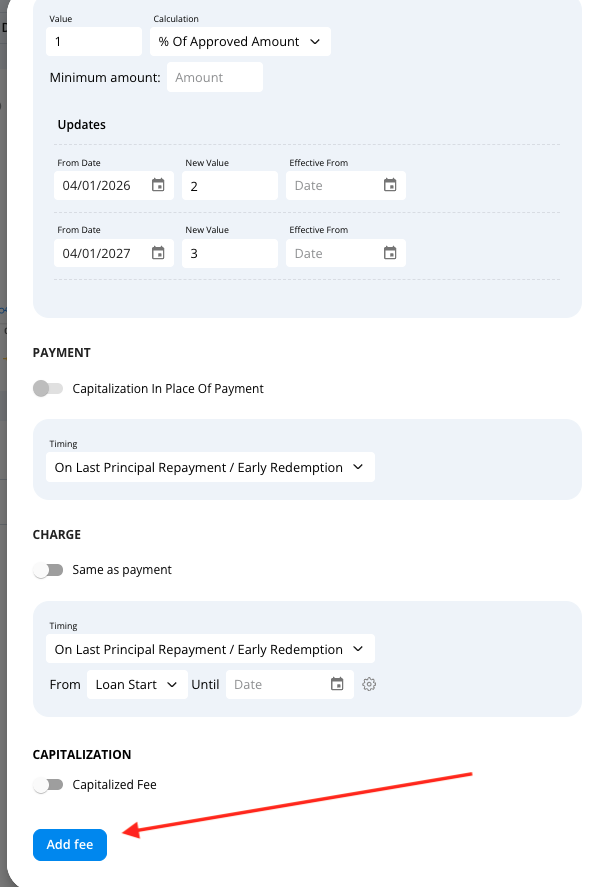
Click Add Fee
Configure the fee as follows:
Fee Type: EOT Fee
Leave all default settings unchanged
→ The default configuration already aligns with system logic and OID handling

Step 2: Define the Initial Fee Rate
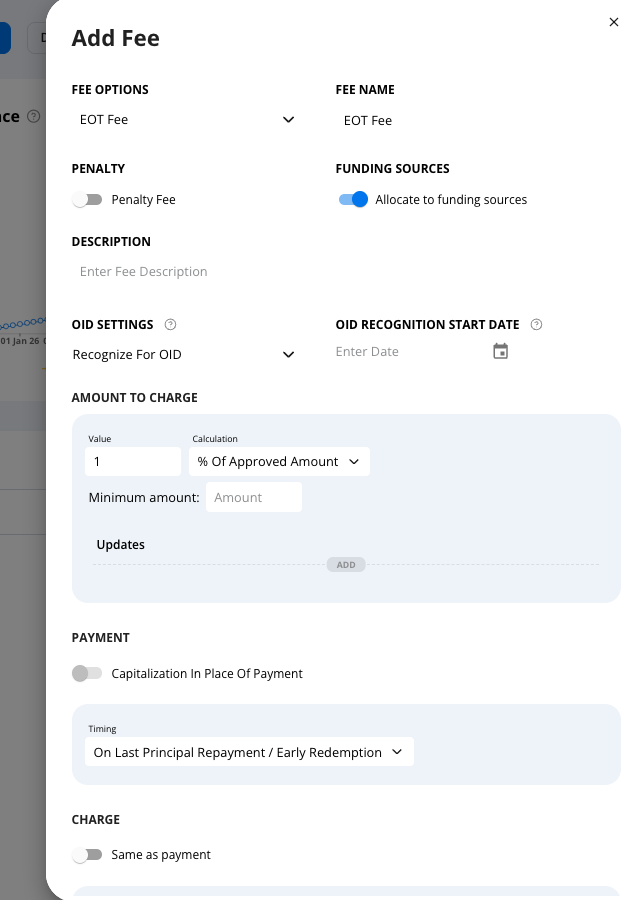
Set the initial Backend Fee rate (for example: 1% of the approved amount)
This rate applies starting from the loan start date
Example:
Loan start date: April 25
Initial BE fee rate: 1%
Step 3: Add Rate Changes for Different Periods
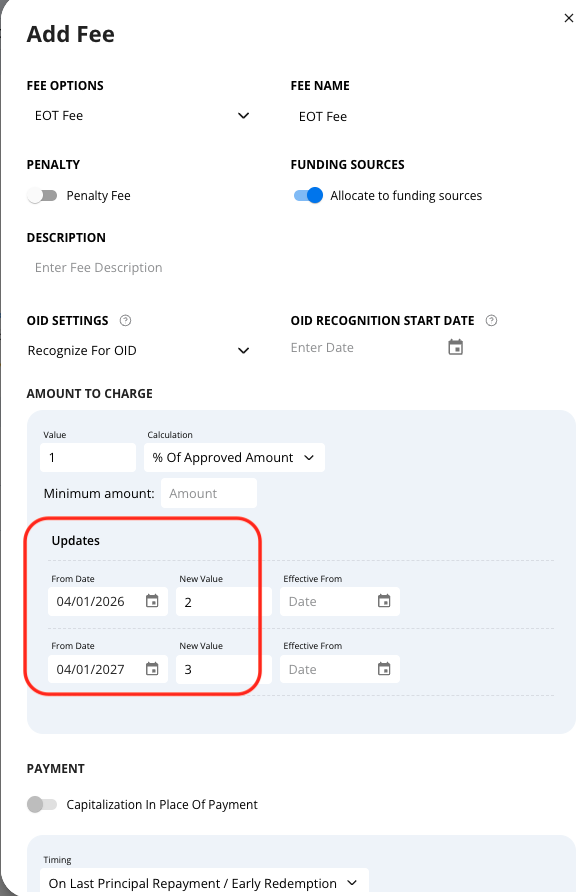
Example Timeline
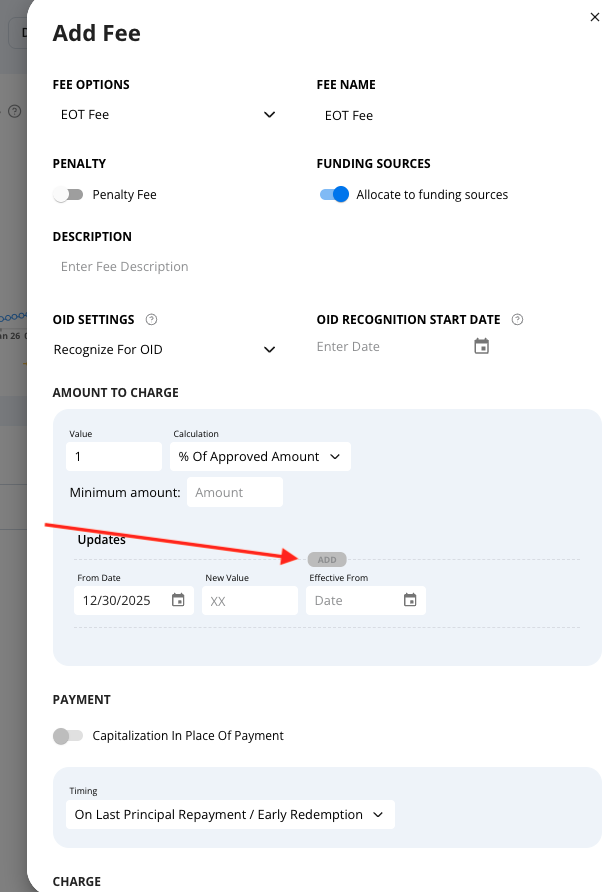
First rate change
From date: April 26
Rate: 2% of approved amount
Second rate change (after one year)
From date: April 27 (following year)
Rate: 3% of approved amount
🔁 You may add as many rate changes as needed, each with its own effective date.
Step 4: (Optional) OID Effective Date Adjustments
If required, you may define a separate Effective From date
This is optional and only relevant when OID recognition timing should differ from the rate actual date
In most cases, the From Date alone is sufficient
Step 5: Save the Fee
Click Add Fee / Save
The system will automatically:
Recognize the fee for OID
Apply weighted averaging across all defined periods
What Happens in the Background
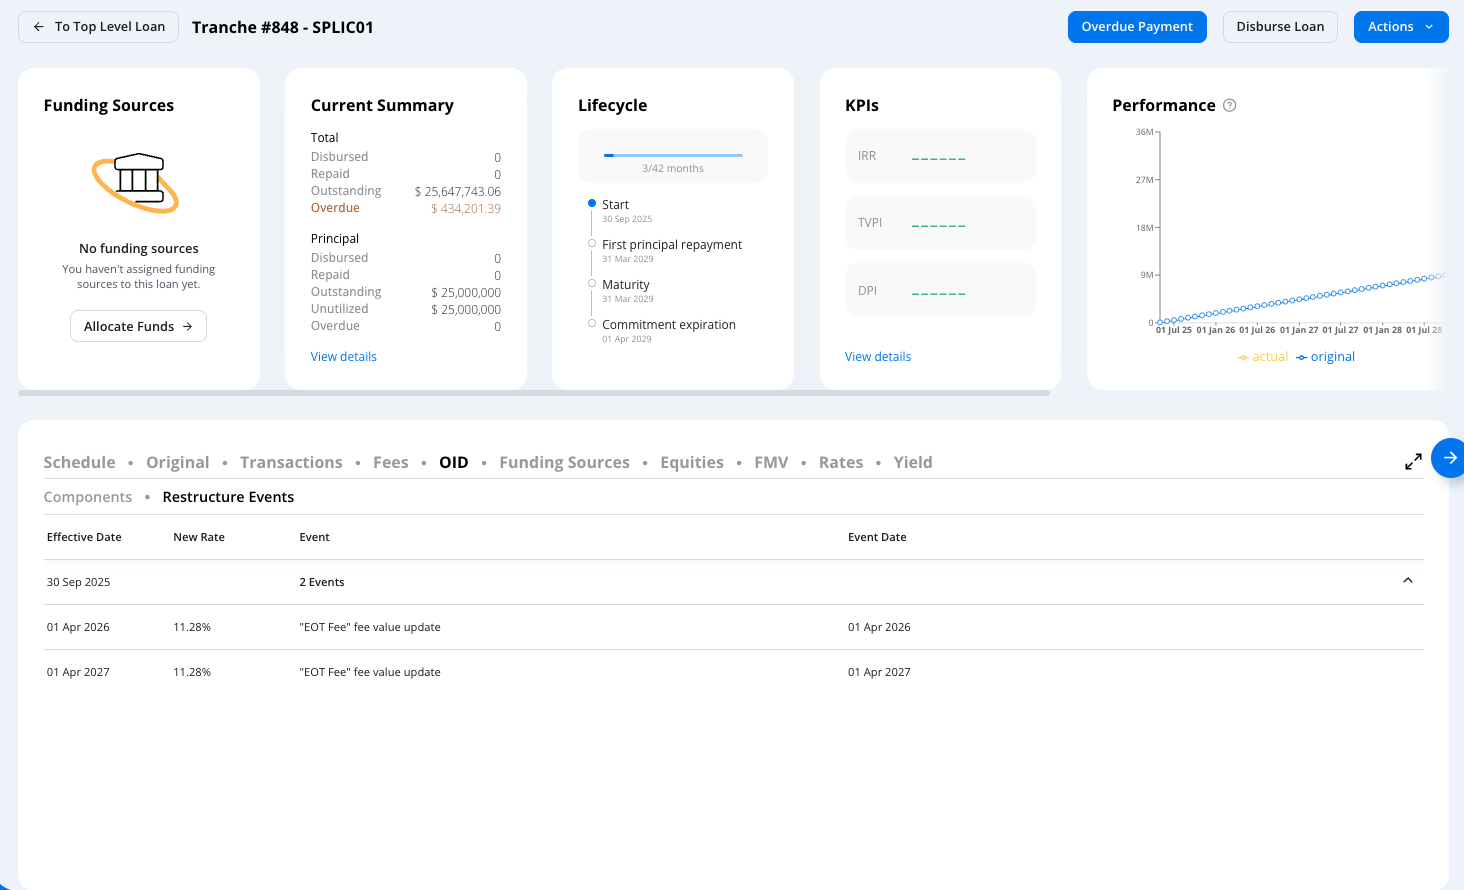
Each rate update creates a restructure event
Each restructure event:
Updates the End-of-Term Fee value
Recalculates the total OID
You can track:
The event date
The updated rate
The impact on OID
This ensures:
Accurate weighted-average Backend Fee
Full audibility
Correct OID allocation across periods