Non-Accrual/Defaulted Loan Setup Guide
Last updated: October 12, 2026
This guide explains how to configure non-accrual periods in Hypercore, depending on your use case:
Temporary non-accrual (grace period)
Stop interest accrual from a specific date (Defaulted or impaired loans)
Yield / OID non-accrual handling
Marking a loan as Defaulted (flag for tracking — NEW)
1. Temporary Non-Accrual (Grace Period)
Use this option when you want to temporarily stop principal and/or interest accrual for a defined period.
Step-by-Step
Navigate to Loan Terms
Go to the Loan Page
Click the Terms tab
Click ➕ Add Terms
Set Up Grace Period
Set the Terms Update Date to the date the non-accrual should begin
Locate Principal Grace Period:
Enter the start and end dates
For interest non-accrual, locate Interest Grace Period
Enter the relevant dates
Save & Validate
Click Save
Review the Loan Schedule to confirm accrual is paused during the selected period
💡Important Notes: During a grace period no principal accrues and no interest accrues.
After the grace period ends, accrual resumes automatically based on the original terms.
2. Stop Accruing Interest (Defaulted / Impaired Loan)
Use this method when a loan is in default or impairment and should stop accruing interest permanently (or until further notice).
Step-by-Step
Navigate to Rate Updates
Go to the Loan Page
Open the Terms panel (right side)
Click Update Loan Terms → Rates Update
(or “New Loan Terms” if required)
Configure 0% Rate
Set the Effective Date for when non-accrual should begin
In the Rate Updates grid, set:
Interest Rate = 0%
If applicable, adjust:
Margin
Min Rate
Max Rate
(to ensure they do not override the 0% rate)
Save & Validate
Click Save
Review the Schedule to confirm interest stops accruing from that date
Optional: You may also mark the loan as Defaulted for tracking and reporting - see Section 4. This changes the Life Cycle only and does not stop accrual by itself.
Important Notes: This approach
A. preserves historical interest rates
B. keeps a full audit trail
C. Is fully reversible with a future rate update
3. Non-Accrual – Yield / OID Handling
If the loan includes OID / EIR (Effective Interest Rate):
Required Configuration:
Make sure to also define the non-accrual period inside the OID Settings of the same loan terms update.
Otherwise:
The system may stop cash interest, but still continue yield amortization in reports
This ensure both cash interest and yield recognition are aligned.
4. Marking a Loan as Defaulted
Use this when you want to visibly flag a loan as defaulted for tracking and reporting — without changing its terms or schedule.
This is a manual setting you control. It sets the loan's Life Cycle to Defaulted, shows red Defaulted indicators, and lets you filter defaulted loans in the Loans list.
It does NOT stop interest accrual. To stop accrual, also use Section 2 (0% Rate Update).
Where you see it
Loan Page header: red
Defaulted (X days)tag.Loan Page Lifecycle card:
Defaulted/Default resolvedentries in the timeline, including notes.Loans list: red
Defaultedvalue in the Life Cycle column.Filter: Loans → Filters → Life Cycle →
Defaulted.
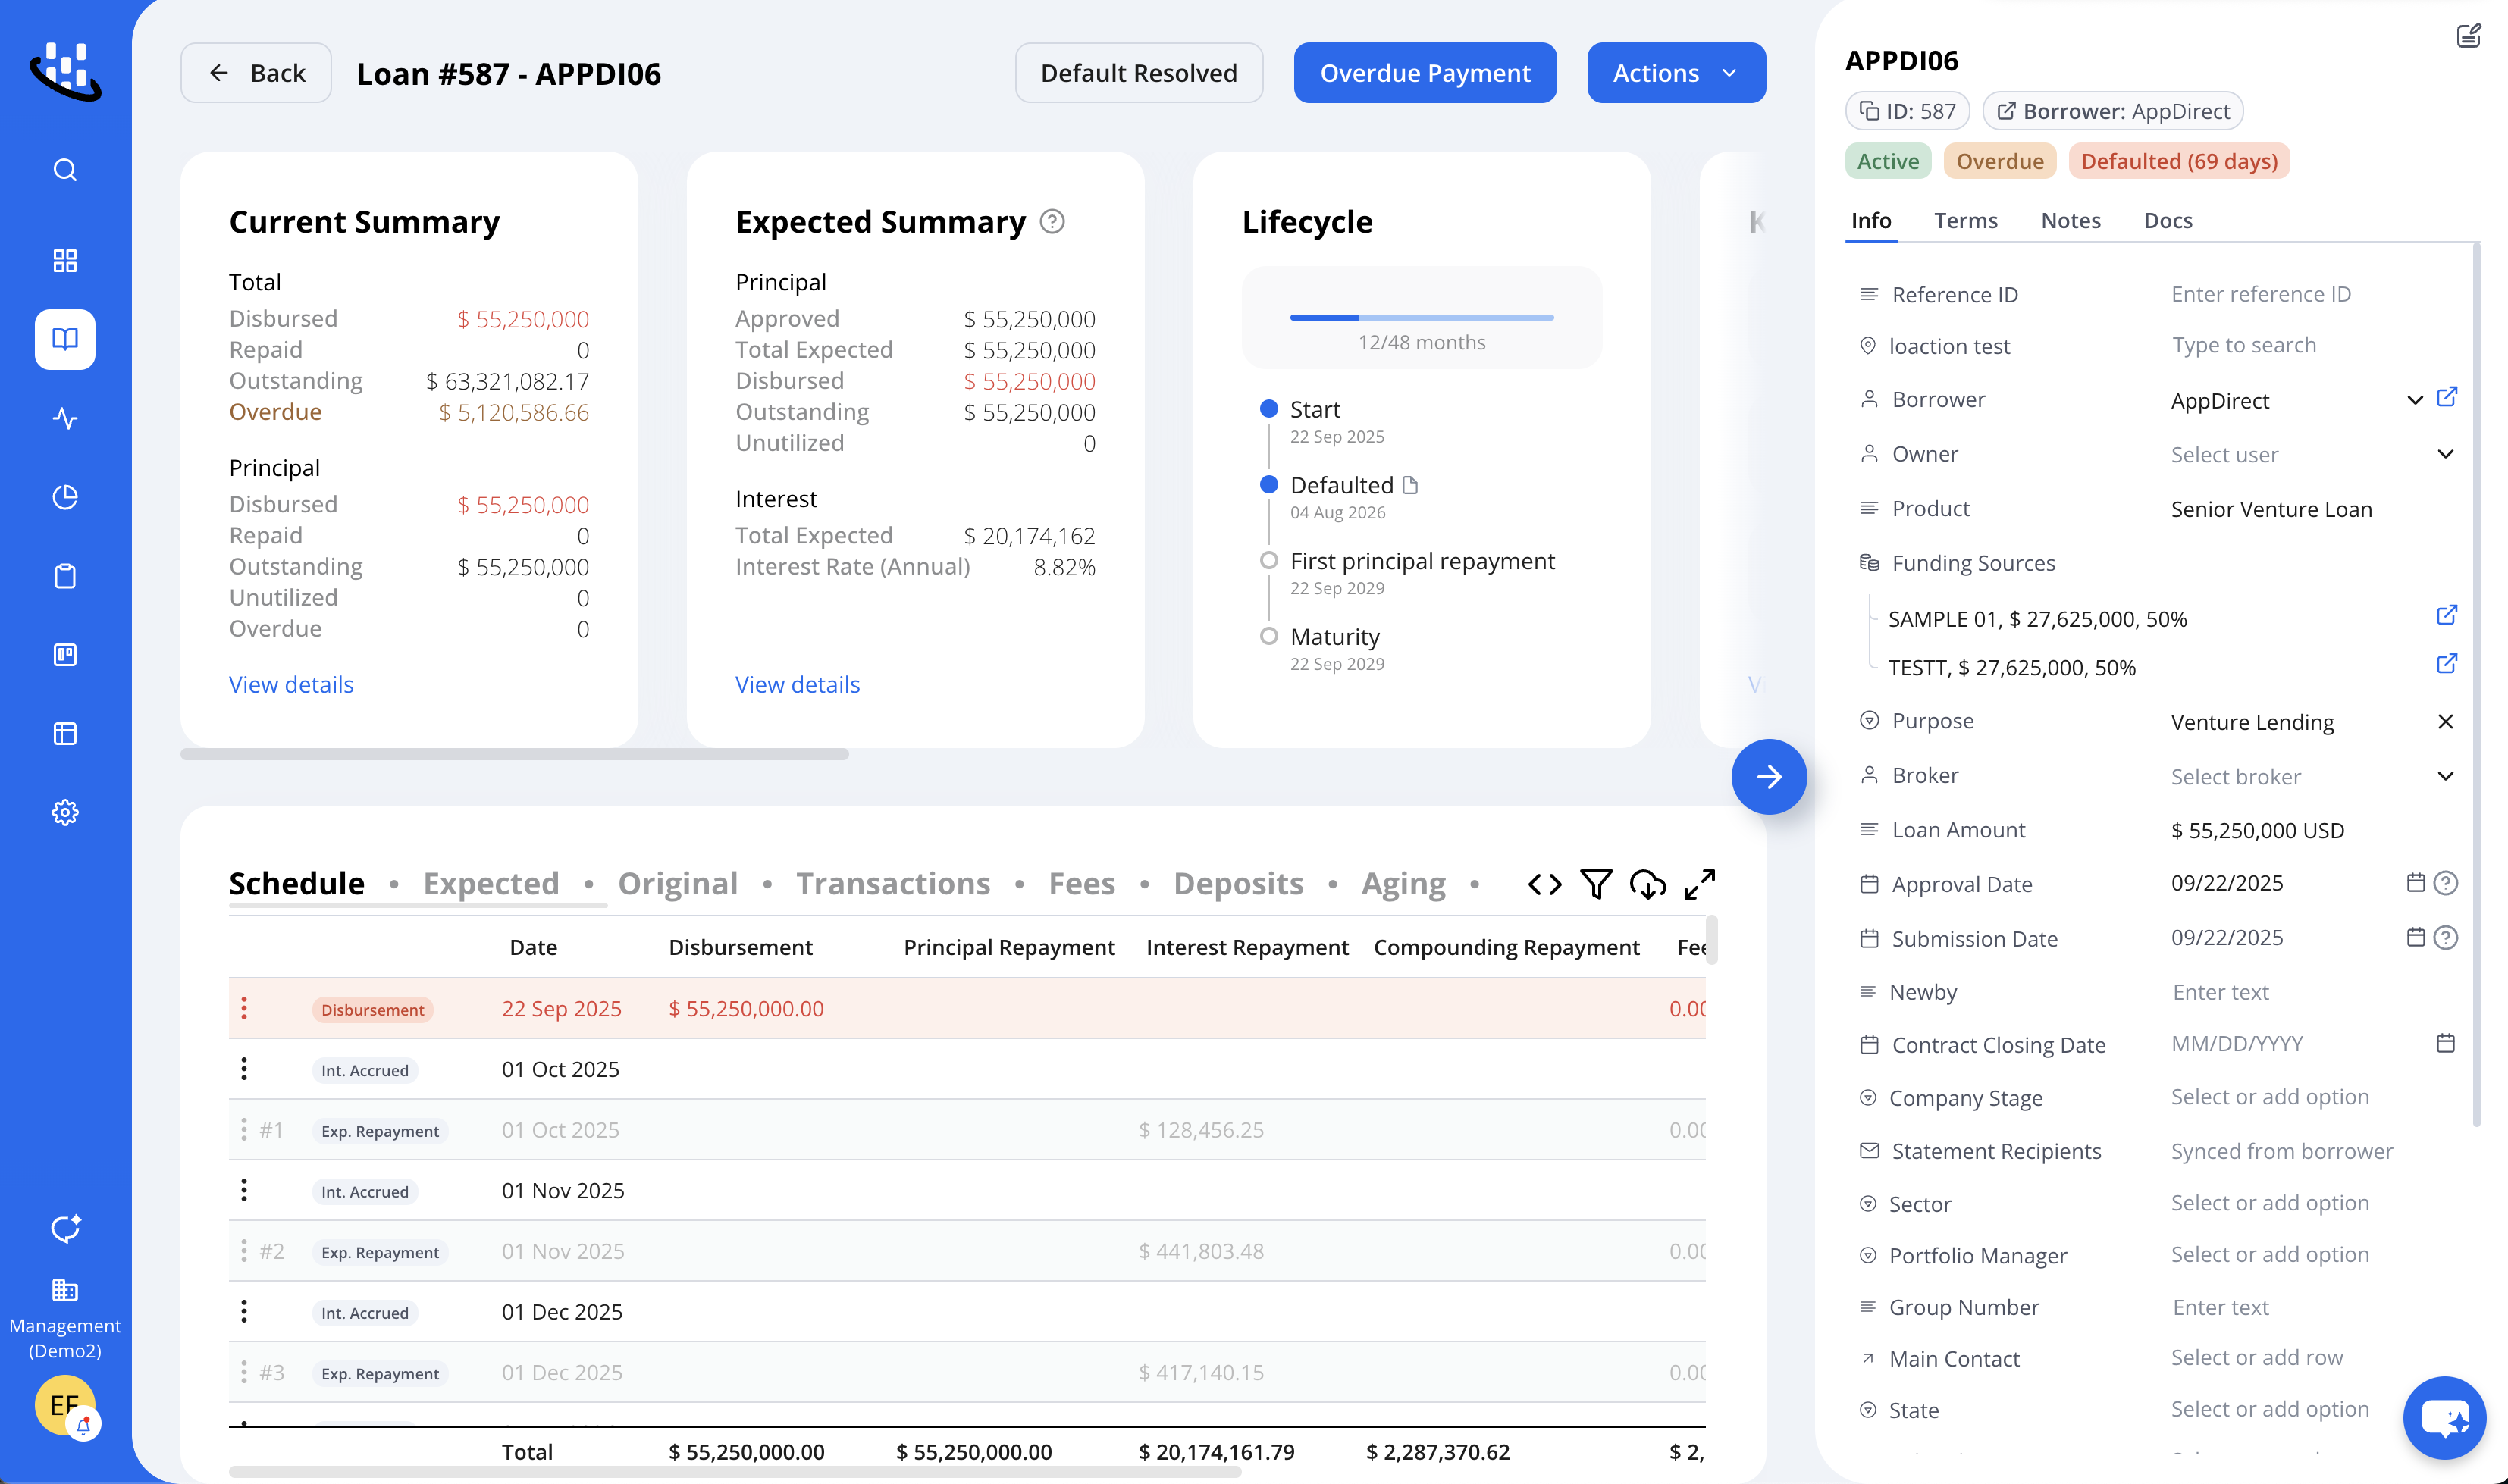
How to mark defaulted/resolve
Go to the Loan Page.
Click Mark as Defaulted in the top bar (appears for Active loans with overdue), set Defaulted On + reason, then Submit.
Or Actions (top-right) → Configuration (⚙) → Edit Default Events.
To resolve, click Default Resolved in the top bar, set the resolved date + note, then Submit.
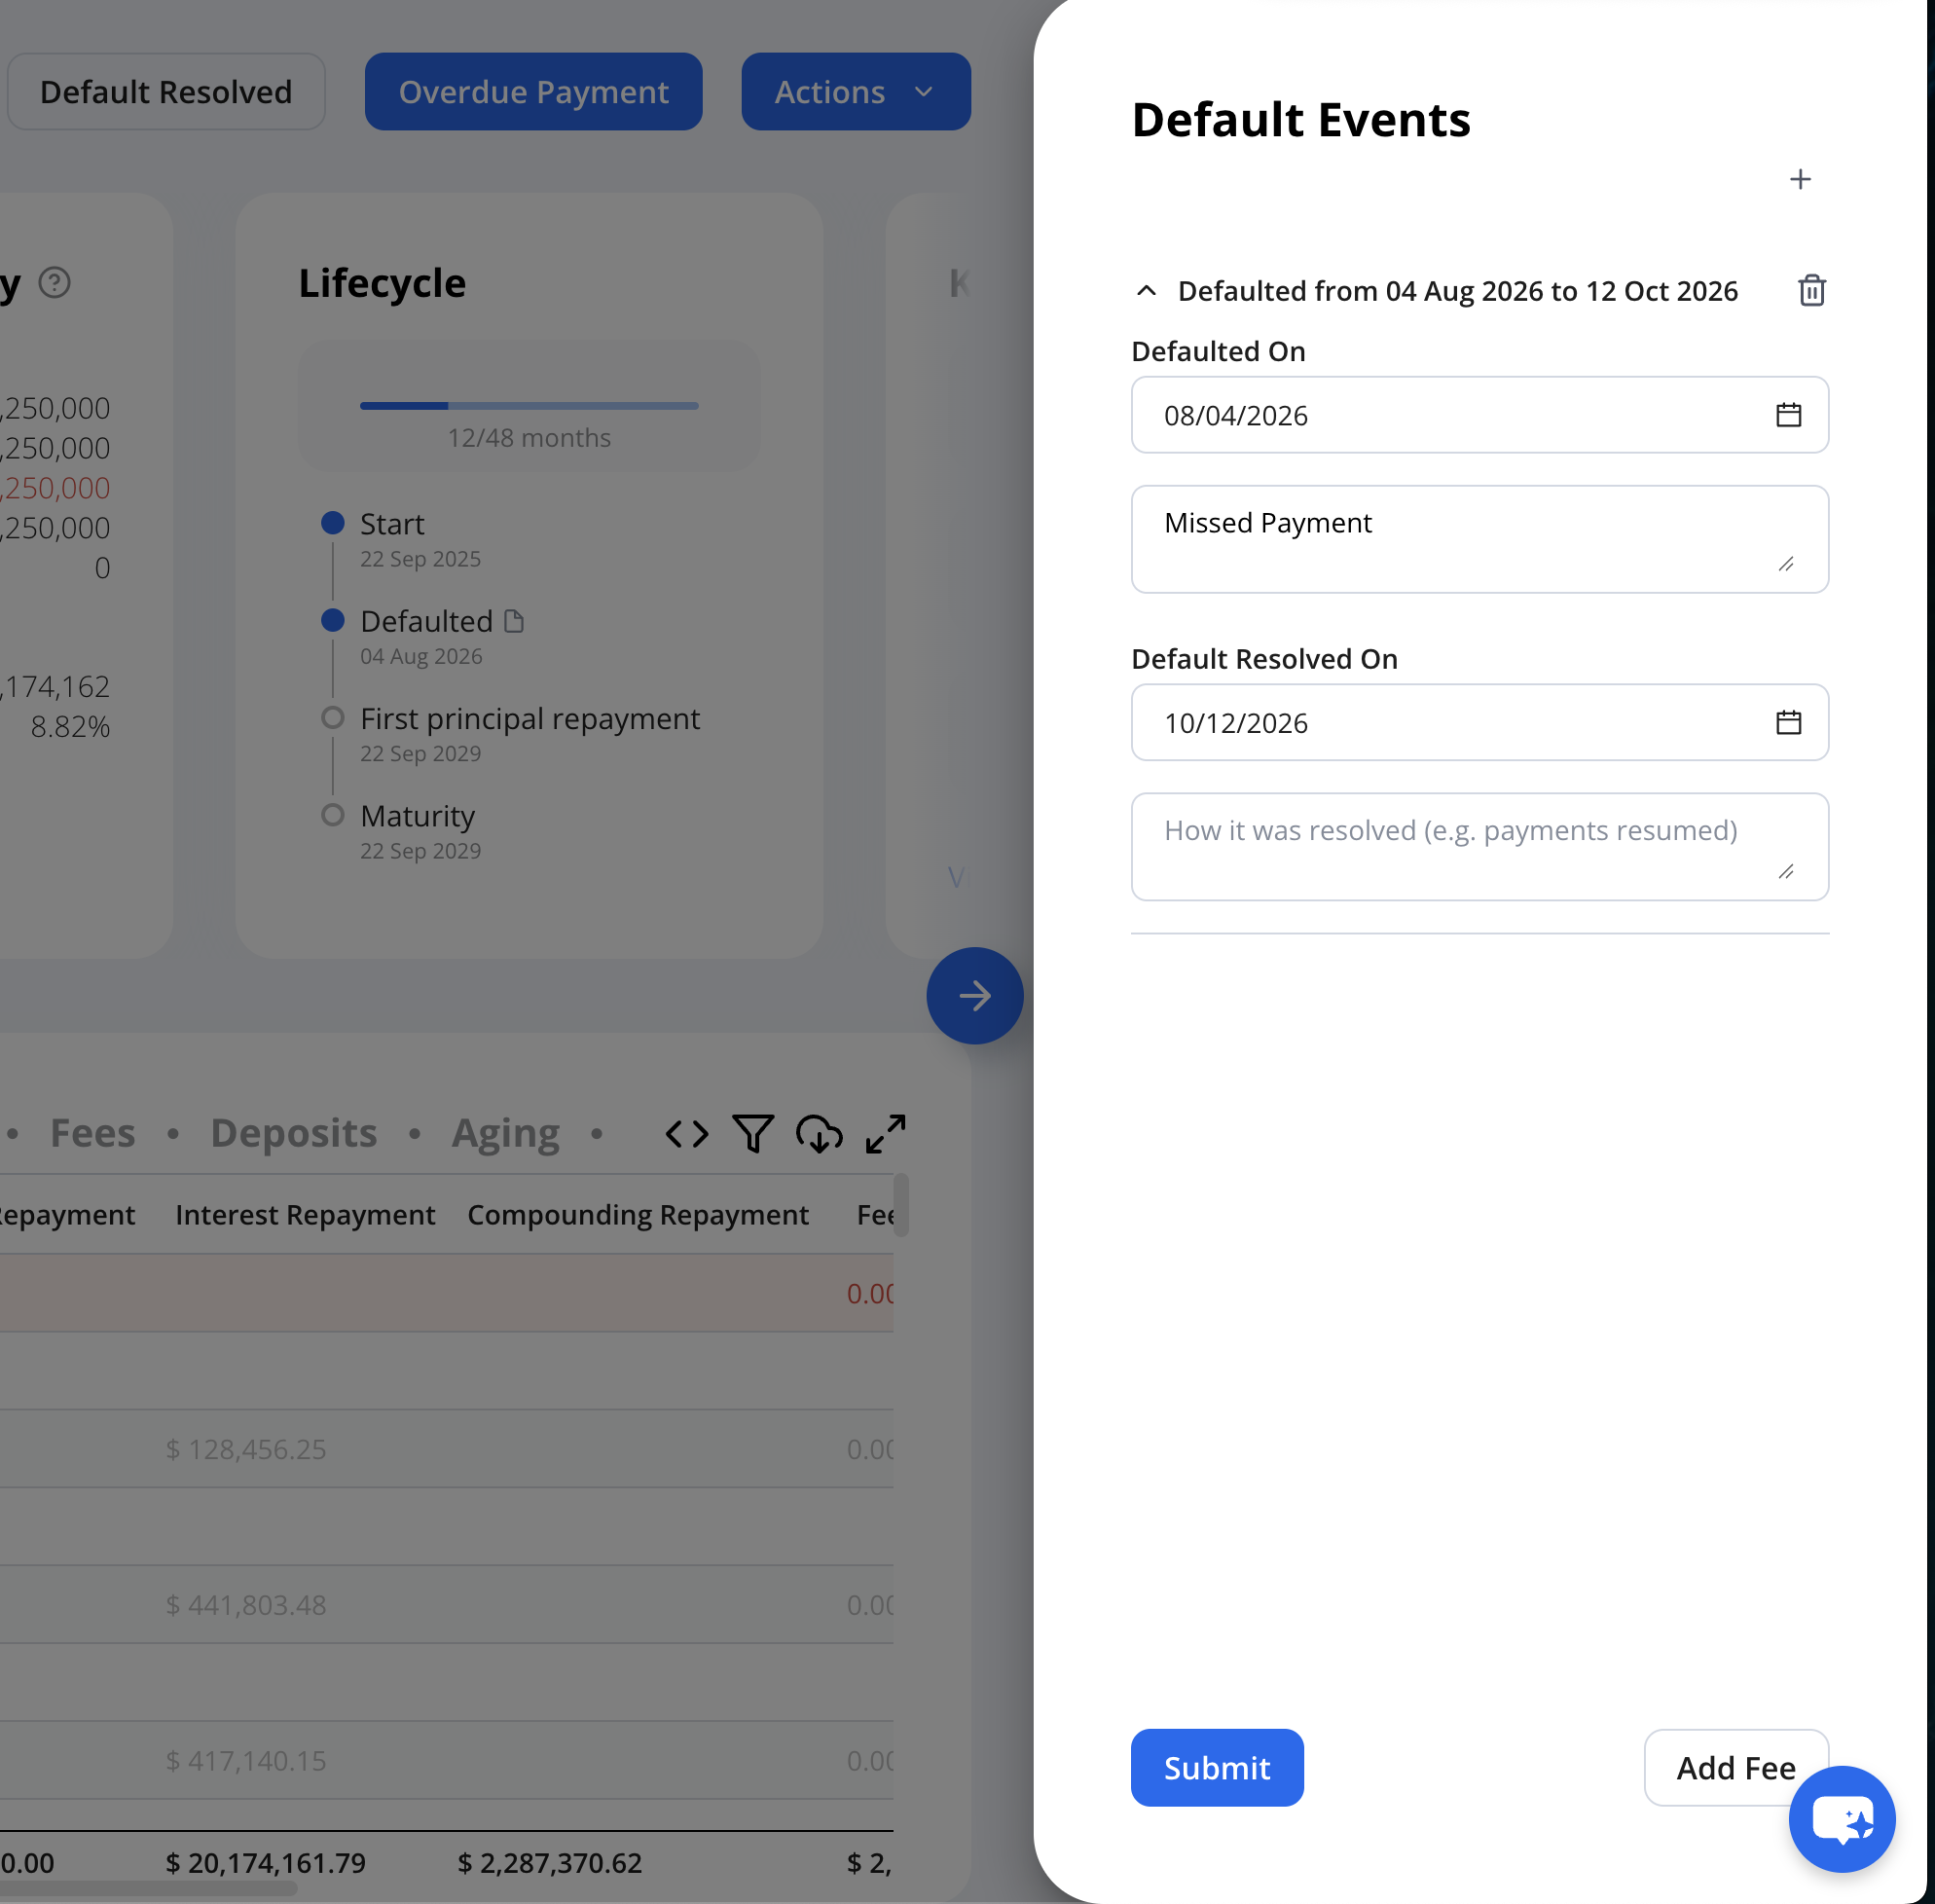
How to view/edit history via Actions
Go to the Loan Page → Actions (top-right) → Configuration (⚙) → Edit Default Events.
Here you can add past periods, fix dates/notes, or add a new period. Only the last period can stay open (no resolved date), and periods cannot overlap.
Click Submit and confirm.